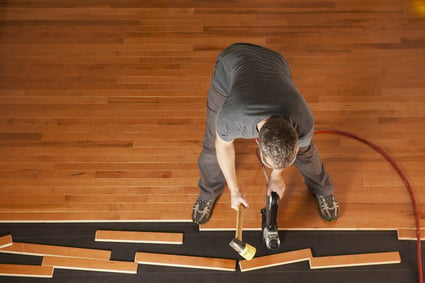
Hardwood flooring not only adds warmth and beauty to any room, it can also boost the value of your home or office. It can be installed at any level of a home and is available in several constructions to allow for flexibility. Hardwood flooring can be found in a variety of styles, including cork, bamboo and a series of exotic and domestic series. Some homeowners opt for pre-stained or pre-finished hardwood that is generally stronger than hardwood that is site-applied. Follow this process of installing hardwood floors in the most organized and best way possible.

© Michael Pettigrew ' Fotolia.com
Required Tools for Installation
To achieve professional results, there are a number of tools you will need to complete the job. Basic tools include a staple gun, tape measure, wood glue and putty, 2-inch hardwood flooring cleat nails, 2 inch (16 gauge) galvanized finished nails, and a pry bar. A hardwood flooring nailer will also be needed, as well as a miter saw, jig saw and handheld undercut jamb saw. Safety is an important issue during hardwood floor installation. To maximize safety, earplugs, safety goggles, knee-pads, some face protection and a dust mask should also be available.
Preparation
Before hardwood floors can be installed in your home or office, they must be acclimated to the humidity of the room in which they will be installed. As a general rule of thumb, hardwood flooring should be kept in the home for at least two weeks before the installation. This will allow the wood to loose moisture.
If necessary, remove any old flooring. Level the floor if needed, as it's important for hardwood to be laid on an even surface. Before installation, clean and seal the floor to avoid moisture. Plywood should then be secured to the concrete slab, followed by a layer of felt paper to act as a moisture barrier. To determine how much flooring is needed, find the square footage of the room by measuring its length and width. Multiply the length times the width to determine square footage.
Installation
Hardwood floor installation begins with nailing wood planks to the previously installed pieces of plywood. Manufacturers recommend installing hardwood floors perpendicular to floor joists for reinforcement. Select long boards to begin the first row and align them against the wall with the board tongues facing out towards the center of the room. Create a ½-inch gap between the planks and the wall. The first row of wood needs to be face nailed into the sub-floor and floor joists. Ensure that the first row is properly attached and use the power nailer to install the next row of planks.
Filling, Finishing & Trimming
Wood putty should be used to fill in any holes where the boards have been face-nailed. Touch up any marks or damage caused during installation. Install base molding or trim to finish the walls around the room. Stain or paint the molding if desired. Molding should completely cover the expansion gaps on all sides. Clean up any mess caused by the installation, and sweep and dry mop the floor to remove any dust and dirt particles.
About the Author: Maire Hunter is a DIY and home improvement expert with experience in both commericial and residential construction. For more ideas on DIY and home improvement, visit his website at InstructionsOptional.com.
0 komentar:
Posting Komentar